
如何编写故事
故事捕获了 UI 组件的渲染状态。它是一个带有注解的对象,描述了在给定一组参数(arguments)的情况下组件的行为和外观。
Storybook 使用通用术语参数(arguments,简称 args)来指代 React 的 props、Vue 的 props、Angular 的 @Input 以及其他类似概念。
故事文件存放位置
组件的故事在与组件文件相邻的故事文件中定义。故事文件仅用于开发,不会包含在你的生产构建中。在你的文件系统中,它看起来像这样
components/
├─ Button/
│  ├─ Button.js | ts | jsx | tsx | vue | svelte
│  ├─ Button.stories.js | ts | jsx | tsx | svelte
组件故事格式
我们根据 组件故事格式 (CSF) 定义故事,它是一个基于 ES6 模块的标准,易于编写并在工具之间可移植。
默认导出
默认导出元数据控制 Storybook 如何列出你的故事,并提供插件使用的信息。例如,这是一个故事文件 Button.stories.js|ts 的默认导出
// Replace your-framework with the framework you are using, e.g. react-vite, nextjs, nextjs-vite, etc.
import type { Meta } from '@storybook/your-framework';

import { Button } from './Button';

const meta = {
  component: Button,
} satisfies Meta<typeof Button>;

export default meta;从 Storybook 7.0 版本开始,故事标题作为构建过程的一部分进行静态分析。默认导出必须包含一个可以静态读取的 title 属性,或者一个可以计算出自动标题的 component 属性。使用 id 属性自定义故事 URL 也必须是静态可读的。
定义故事
使用 CSF 文件的命名导出定义组件的故事。我们建议你的故事导出使用 UpperCamelCase 命名法。以下是如何以“primary”状态渲染 Button 并导出一个名为 Primary 的故事。
// Replace your-framework with the framework you are using, e.g. react-vite, nextjs, nextjs-vite, etc.
import type { Meta, StoryObj } from '@storybook/your-framework';

import { Button } from './Button';

const meta = {
  component: Button,
} satisfies Meta<typeof Button>;

export default meta;
type Story = StoryObj<typeof meta>;

export const Primary: Story = {
  args: {
    primary: true,
    label: 'Button',
  },
};
使用 React Hooks
React Hooks 是方便的辅助方法,可以使用更流畅的方式创建组件。如果需要,可以在创建组件故事时使用它们,尽管应将其视为高级用例。我们推荐在编写自己的故事时尽可能使用args。例如,这里有一个使用 React Hooks 改变按钮状态的故事
// Replace your-framework with the framework you are using, e.g. react-vite, nextjs, nextjs-vite, etc.
import type { Meta, StoryObj } from '@storybook/your-framework';

import { Button } from './Button';

const meta = {
  component: Button,
} satisfies Meta<typeof Button>;

export default meta;
type Story = StoryObj<typeof meta>;

/*
 *👇 Render functions are a framework specific feature to allow you control on how the component renders.
 * See https://storybook.org.cn/docs/api/csf
 * to learn how to use render functions.
 */
export const Primary: Story = {
  render: () => <Button primary label="Button" />,
};
重命名故事
你可以重命名任何需要的故事。例如,给它一个更准确的名称。以下是更改 Primary 故事名称的方法
// Replace your-framework with the framework you are using, e.g. react-vite, nextjs, nextjs-vite, etc.
import type { Meta, StoryObj } from '@storybook/your-framework';

import { Button } from './Button';

const meta = {
  component: Button,
} satisfies Meta<typeof Button>;

export default meta;
type Story = StoryObj<typeof meta>;

export const Primary: Story = {
  // 👇 Rename this story
  name: 'I am the primary',
  args: {
    label: 'Button',
    primary: true,
  },
};
你的故事现在将以指定的文本显示在侧边栏中。
如何编写故事
故事是一个描述如何渲染组件的对象。每个组件可以有多个故事,这些故事可以相互构建。例如,我们可以在上面的 Primary 故事的基础上添加 Secondary 和 Tertiary 故事。
// Replace your-framework with the framework you are using, e.g. react-vite, nextjs, nextjs-vite, etc.
import type { Meta, StoryObj } from '@storybook/your-framework';

import { Button } from './Button';

const meta = {
  component: Button,
} satisfies Meta<typeof Button>;

export default meta;
type Story = StoryObj<typeof meta>;

export const Primary: Story = {
  args: {
    backgroundColor: '#ff0',
    label: 'Button',
  },
};

export const Secondary: Story = {
  args: {
    ...Primary.args,
    label: '😄👍😍💯',
  },
};

export const Tertiary: Story = {
  args: {
    ...Primary.args,
    label: '📚📕📈🤓',
  },
};
此外,你可以在为其他组件编写故事时导入 args 进行复用,这在你构建复合组件时很有帮助。例如,如果我们创建一个 ButtonGroup 故事,我们可以将其子组件 Button 的两个故事混合使用。
// Replace your-framework with the framework you are using, e.g. react-vite, nextjs, nextjs-vite, etc.
import type { Meta, StoryObj } from '@storybook/your-framework';

import { ButtonGroup } from '../ButtonGroup';

//👇 Imports the Button stories
import * as ButtonStories from './Button.stories';

const meta = {
  component: ButtonGroup,
} satisfies Meta<typeof ButtonGroup>;

export default meta;
type Story = StoryObj<typeof meta>;

export const Pair: Story = {
  args: {
    buttons: [{ ...ButtonStories.Primary.args }, { ...ButtonStories.Secondary.args }],
    orientation: 'horizontal',
  },
};
当 Button 的签名发生变化时,你只需要修改 Button 的故事来反映新的模式,ButtonGroup 的故事将自动更新。这种模式允许你在组件层级结构中重用数据定义,使你的故事更易于维护。
这还不止!可以使用 Storybook 的 控件面板实时编辑故事函数中的每个 args。这意味着你的团队可以在 Storybook 中动态更改组件进行压力测试并找到边缘情况。
调整控件值后,你还可以使用“控件”面板编辑或保存新的故事。
插件可以增强 args。例如,Actions 会自动检测哪些 args 是回调函数,并向它们追加一个日志记录函数。这样,交互(如点击)就会记录在 actions 面板中。
使用 Play 函数
Storybook 的 play 函数是一个方便的辅助方法,用于测试需要用户干预的组件场景。它们是在故事渲染后执行的小段代码。例如,假设你要验证一个表单组件,可以使用 play 函数编写以下故事,以检查在输入信息时组件的响应情况
// Replace your-framework with the framework you are using, e.g. react-vite, nextjs, nextjs-vite, etc.
import type { Meta, StoryObj } from '@storybook/your-framework';

import { expect } from 'storybook/test';

import { LoginForm } from './LoginForm';

const meta = {
  component: LoginForm,
} satisfies Meta<typeof LoginForm>;
export default meta;

type Story = StoryObj<typeof meta>;

export const EmptyForm: Story = {};

export const FilledForm: Story = {
  play: async ({ canvas, userEvent }) => {
    // 👇 Simulate interactions with the component
    await userEvent.type(canvas.getByTestId('email'), 'email@provider.com');

    await userEvent.type(canvas.getByTestId('password'), 'a-random-password');

    // See https://storybook.org.cn/docs/essentials/actions#automatically-matching-args to learn how to setup logging in the Actions panel
    await userEvent.click(canvas.getByRole('button'));

    // 👇 Assert DOM structure
    await expect(
      canvas.getByText(
        'Everything is perfect. Your account is ready and we should probably get you started!'
      )
    ).toBeInTheDocument();
  },
};
你可以在 交互面板中与故事的 play 函数进行交互和调试。
使用参数
Parameters 是 Storybook 定义故事静态元数据的方法。故事的 parameters 可用于在故事或故事组级别为各种插件提供配置。
例如,假设你想让 Button 组件使用一组不同于应用中其他组件的背景进行测试。你可以添加一个组件级别的 backgrounds 参数
// Replace your-framework with the framework you are using, e.g. react-vite, nextjs, vue3-vite, etc.
import type { Meta } from '@storybook/your-framework';

import { Button } from './Button';

const meta = {
  component: Button,
  //👇 Creates specific parameters at the component level
  parameters: {
    backgrounds: {
      options: {},
    },
  },
} satisfies Meta<typeof Button>;

export default meta;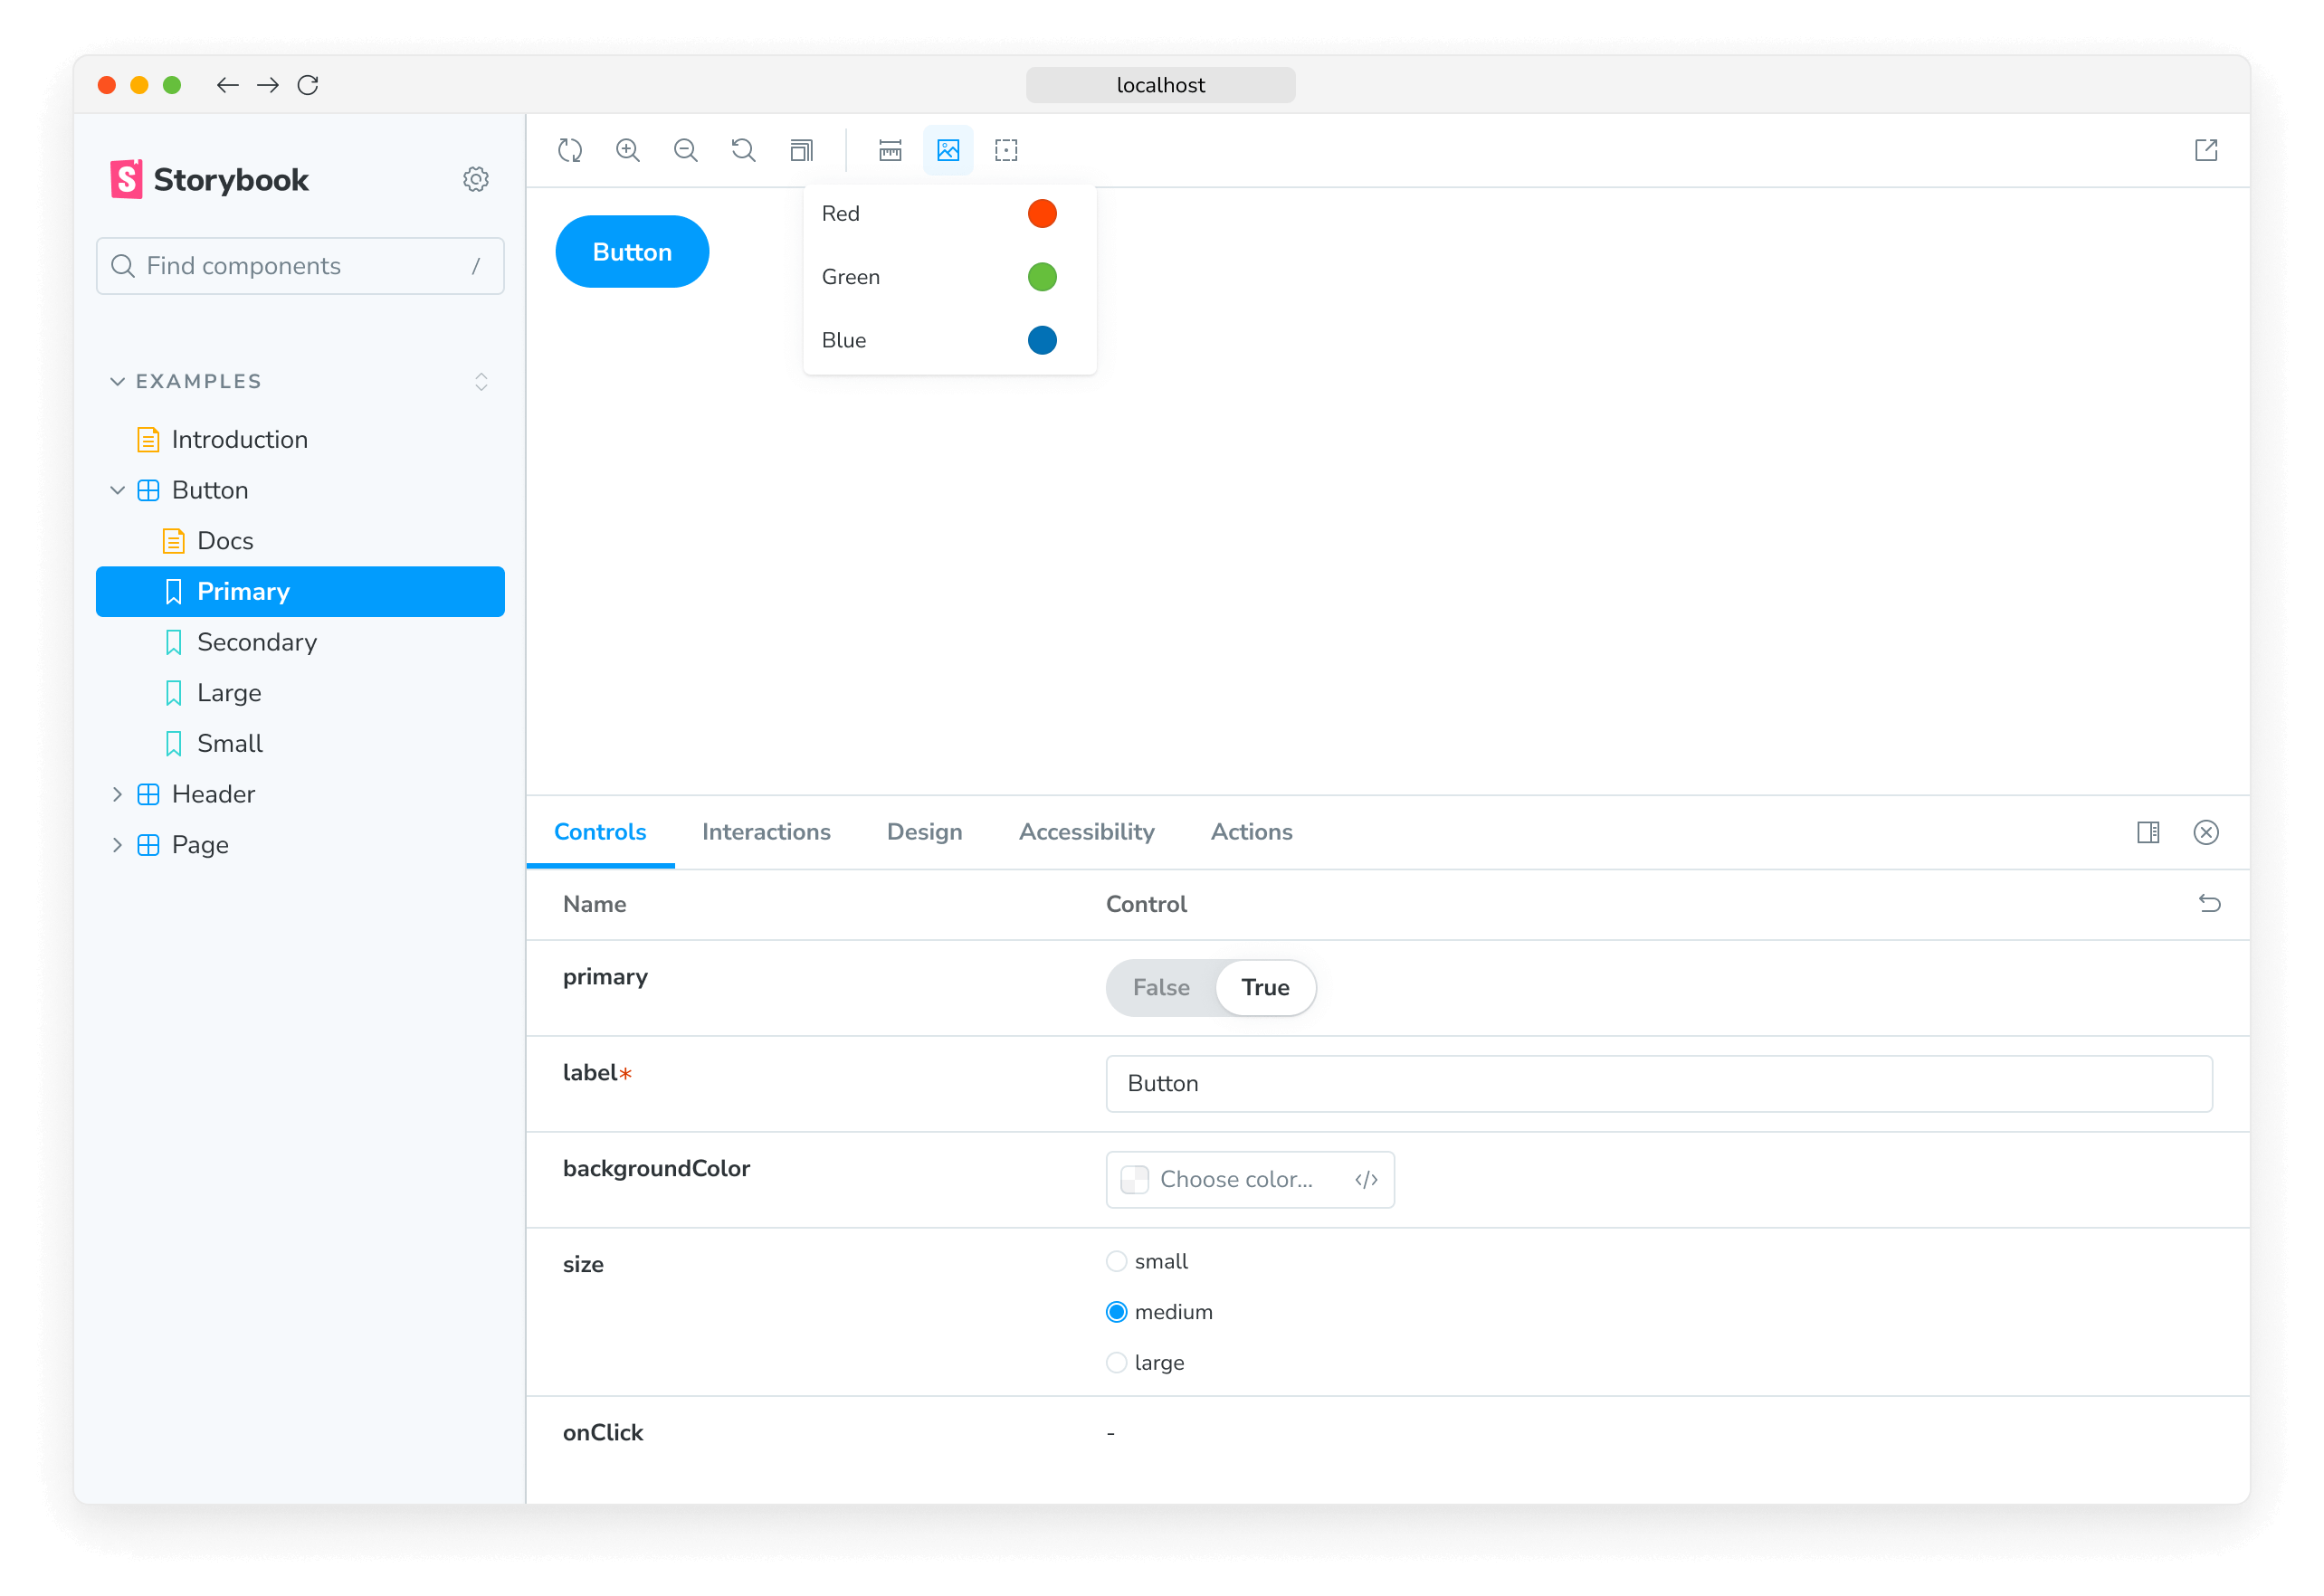
此 parameter 会指示 backgrounds 插件在选择 Button 故事时重新配置自身。大多数插件通过基于 parameter 的 API 进行配置,可以在全局、组件和故事级别进行影响。
使用装饰器
装饰器是一种机制,用于在渲染故事时将组件包装在任意标记中。组件通常在假设其渲染“位置”的情况下创建。你的样式可能需要主题或布局包装器,或者你的 UI 可能需要特定的上下文或数据提供者。
一个简单的例子是为组件的故事添加内边距。可以使用一个将故事包装在带有内边距的 div 中的装饰器来实现,如下所示
// Replace your-framework with the framework you are using, e.g. react-vite, nextjs, nextjs-vite, etc.
import type { Meta, StoryObj } from '@storybook/your-framework';

import { Button } from './Button';

const meta = {
  component: Button,
  decorators: [
    (Story) => (
      <div style={{ margin: '3em' }}>
        {/* 👇 Decorators in Storybook also accept a function. Replace <Story/> with Story() to enable it  */}
        <Story />
      </div>
    ),
  ],
} satisfies Meta<typeof Button>;

export default meta;装饰器可以更复杂,并且通常由插件提供。你还可以在故事、组件和全局级别配置装饰器。
两个或更多组件的故事
有时你可能有两个或更多组件被创建为协同工作。例如,如果你有一个父级 List 组件,它可能需要子级 ListItem 组件。
// Replace your-framework with the framework you are using, e.g. react-vite, nextjs, nextjs-vite, etc.
import type { Meta, StoryObj } from '@storybook/your-framework';

import { List } from './List';

const meta = {
  component: List,
} satisfies Meta<typeof List>;

export default meta;
type Story = StoryObj<typeof meta>;

// Always an empty list, not super interesting
export const Empty: Story = {};
在这种情况下,为每个故事渲染不同的函数是有意义的
// Replace your-framework with the framework you are using, e.g. react-vite, nextjs, nextjs-vite, etc.
import type { Meta, StoryObj } from '@storybook/your-framework';

import { List } from './List';
import { ListItem } from './ListItem';

const meta = {
  component: List,
} satisfies Meta<typeof List>;

export default meta;
type Story = StoryObj<typeof meta>;

export const Empty: Story = {};

/*
 *👇 Render functions are a framework specific feature to allow you control on how the component renders.
 * See https://storybook.org.cn/docs/api/csf
 * to learn how to use render functions.
 */
export const OneItem: Story = {
  render: (args) => (
    <List {...args}>
      <ListItem />
    </List>
  ),
};

export const ManyItems: Story = {
  render: (args) => (
    <List {...args}>
      <ListItem />
      <ListItem />
      <ListItem />
    </List>
  ),
};
你还可以在 List 组件中重用子级 ListItem 的故事数据。这更容易维护,因为你无需在多个地方更新它。
// Replace your-framework with the framework you are using, e.g. react-vite, nextjs, nextjs-vite, etc.
import type { Meta, StoryObj } from '@storybook/your-framework';

import { List } from './List';
import { ListItem } from './ListItem';

//👇 We're importing the necessary stories from ListItem
import { Selected, Unselected } from './ListItem.stories';

const meta = {
  component: List,
} satisfies Meta<typeof List>;

export default meta;
type Story = StoryObj<typeof meta>;

export const ManyItems: Story = {
  render: (args) => (
    <List {...args}>
      <ListItem {...Selected.args} />
      <ListItem {...Unselected.args} />
      <ListItem {...Unselected.args} />
    </List>
  ),
};请注意,这样编写故事存在缺点,因为你无法充分利用 args 机制以及在构建更复杂的复合组件时组合 args 的能力。更多讨论,请参阅多组件故事工作流程文档。