自动化可视化测试
在正常的开发过程中,bug 是不可避免的。自动化可视化测试利用机器检测 UI 外观的变化,供人工检查。
简而言之,会为每个组件变体拍摄图像快照。这作为可视化测试的“基准”。每次提交时,都会捕获新的快照,然后与基准进行逐像素比较。如果存在 UI 变化,您将收到通知以检查它们是 bug 还是有意更新。
在 GitHub 中设置仓库
开始之前,我们的本地 CommentList 代码需要与远程版本控制服务同步。
前往 GitHub 此处为项目创建一个新仓库。将仓库命名为 "commentlist",与我们的本地项目名称相同。

然后按照说明设置仓库。将 your-username 替换为您的 GitHub 账户名。
git init
git add .
git commit -m "first commit"
git branch -M main
git remote add origin https://github.com/your-username/commentlist.git
git push -u origin main
设置 Chromatic
我们将使用 Storybook 维护者提供的 Chromatic 来演示图像快照过程。前往 chromatic.com 并使用您的 GitHub 账户注册。

在 ಅಲ್ಲಿ, 选择您刚刚创建的仓库。
UI 测试会在云浏览器环境中捕获每个故事的图像快照。每当您推送代码时,Chromatic 都会生成一组新的快照,并将其与基准进行比较。如果存在视觉变化,您需要验证它们是否是故意的。
建立基准
将 Chromatic 作为开发包添加到您的项目
yarn add --dev chromatic
安装完成后,我们就准备好了。现在是提交并将更改推送到远程仓库的绝佳时机。
git add .
git commit -m "Added Chromatic"
git push
使用 chromatic 命令构建并发布我们的 Storybook。别忘了将 project-token 替换为 Chromatic 在网站上提供的 token。
npx chromatic --project-token=<project-token>
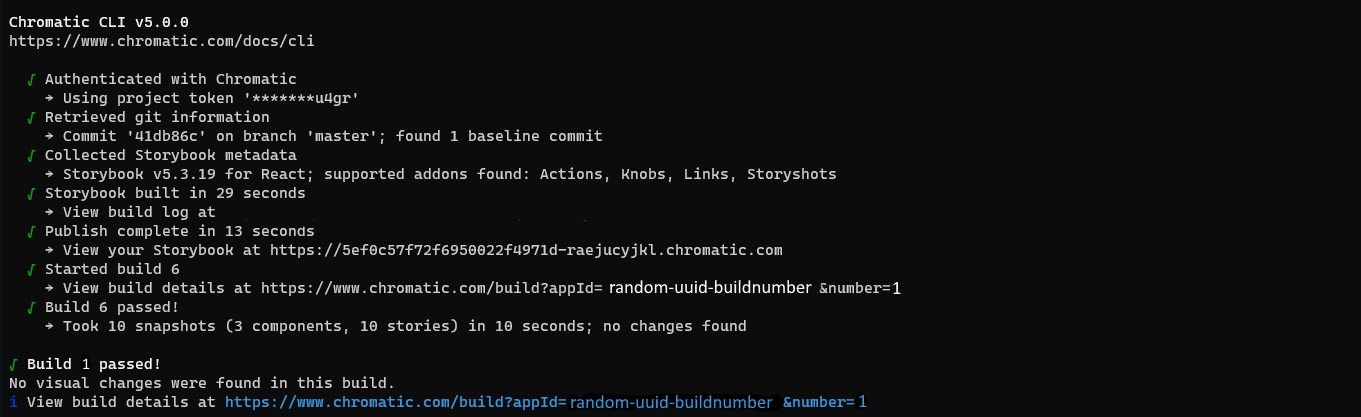
通过这个命令,您就发布了 Storybook,触发 Chromatic 捕获了每个故事的图像快照(在标准化的云浏览器中),并将该快照设置为基准。
后续构建将生成新的快照,并与现有基准进行比较以检测 UI 变化。

运行测试
每当拉取请求包含 UI 变化时(无论大小),运行可视化测试都很有帮助。Chromatic 会将新快照与先前构建中的现有基准进行比较。
让我们做一个小的 UI 更改来演示这个概念。
git checkout -b change-commentlist-outline
调整 CommentList 组件
import styled, { createGlobalStyle } from "styled-components";

interface Author {
  name: string;
  avatar: string;
}

interface Comment {
  text: string;
  author: Author;
}

export interface CommentListProps {
  /**
   * Is the component in the loading state
   */
  loading?: boolean;

  /**
   * Total number of comments
   */
  totalCount?: number;

  /**
   * List of comments
   */
  comments?: Comment[];
}

const CommentListWrapper = styled.div`
  font-family: "Nunito Sans", "Helvetica Neue", Helvetica, Arial, sans-serif;
  color: #333;
  display: inline-block;
  vertical-align: top;
  width: 265px;
`;

const CommentItem = styled.div`
  font-size: 12px;
  line-height: 14px;
  clear: both;
  height: 48px;
  margin-bottom: 10px;
  box-shadow: rgba(0, 0, 0, 0.2) 0 0 10px 0;
  background: linear-gradient(
    120deg,
    rgba(248, 248, 254, 0.95),
    rgba(250, 250, 250, 0.95)
  );
  border-radius: 48px;
+ border: 4px solid red;
+ font-weight: bold;
`;

const Avatar = styled.div`
  float: left;
  position: relative;
  overflow: hidden;
  height: 48px;
  width: 48px;
  margin-right: 14px;
  background: #dfecf2;
  border-radius: 48px;
`;

const AvatarImg = styled.img`
  position: absolute;
  height: 100%;
  width: 100%;
  left: 0;
  top: 0;
  z-index: 1;
  background: #999;
`;

const Message = styled.div`
  overflow: hidden;
  padding-top: 10px;
  padding-right: 20px;
`;

const Author = styled.span`
  font-weight: bold;
`;

const CommentText = styled.span``;

const GlobalStyle = createGlobalStyle`
   @import url('https://fonts.googleapis.com/css?family=Nunito+Sans:400,400i,800');
 `;

/**
* The Commentlist component should display the comments from the user.
*/
export default function CommentList({
  loading = false,
  comments = [],
  totalCount = 10,
}: CommentListProps) {
  if (loading) {
    return <div>loading</div>;
  }
  if (comments.length === 0) {
    return <div>empty</div>;
  }
  return (
    <>
      <GlobalStyle />
      <CommentListWrapper>
        {comments.map(({ text, author: { name, avatar } }) => (
          <CommentItem key={`comment_${name}`}>
            <Avatar>
              <AvatarImg src={avatar} />
            </Avatar>
            <Message>
              <Author>{name}</Author> <CommentText>{text}</CommentText>
            </Message>
          </CommentItem>
        ))}
      </CommentListWrapper>
    </>
  );
}
提交更改,将其推送到仓库并运行 Chromatic
git commit -am "make CommentList sparkle"
git push -u origin change-commentlist-outline
npx chromatic --project-token=<project-token>
在您的 GitHub 仓库中为新分支打开一个拉取请求。

Chromatic 检测到了 UI 变化供您审查!转到 PR 检查并点击 "🟡 UI Test" 查看更改列表。构建将被标记为“未审查”,更改会列在“测试”表中。

审查更改
自动化可视化测试确保组件不会意外改变。但仍然需要开发人员来确定更改是否是故意的。
如果更改是故意的,我们接受该快照以更新基准。这意味着未来的测试将与带有红色边框的 CommentList 进行比较。
如果更改不是故意的,就需要修复。我们的设计师认为 ✨majestic✨ 红色边框太糟糕了,所以我们撤销它。

合并更改
Bug 修复且基准更新后,您就可以将代码合并回目标分支了。Chromatic 会在分支之间转移所有已接受的基准,这样您只需接受一次基准。

持续集成
每次进行更改时都在本地运行此命令很麻烦。生产团队在代码推送到其 CI/CD 流水线时会触发可视化测试运行。虽然我们不会在本教程中设置它,但您可以在Chromatic 的 CI 文档中了解更多信息。
您的旅程开始了
可视化测试手册展示了领先的前端团队如何测试 UI 外观。这是验证 UI 与预期设计相符并随时间推移保持无 bug 的实用方法。
我们希望本指南能启发您自己的可视化测试策略。最后一章提供了完整的示例代码和有用的资源。