next-auth-mock
安装
将此库添加到您的 devDependencies 中进行安装
pnpm add --save-dev @tomfreudenberg/next-auth-mock
Storybook
添加到 Storybook 预览
更新 .storybook/main.js 并将其追加到您的插件列表中
module.exports = {
  addons: ['@tomfreudenberg/next-auth-mock/storybook']
}
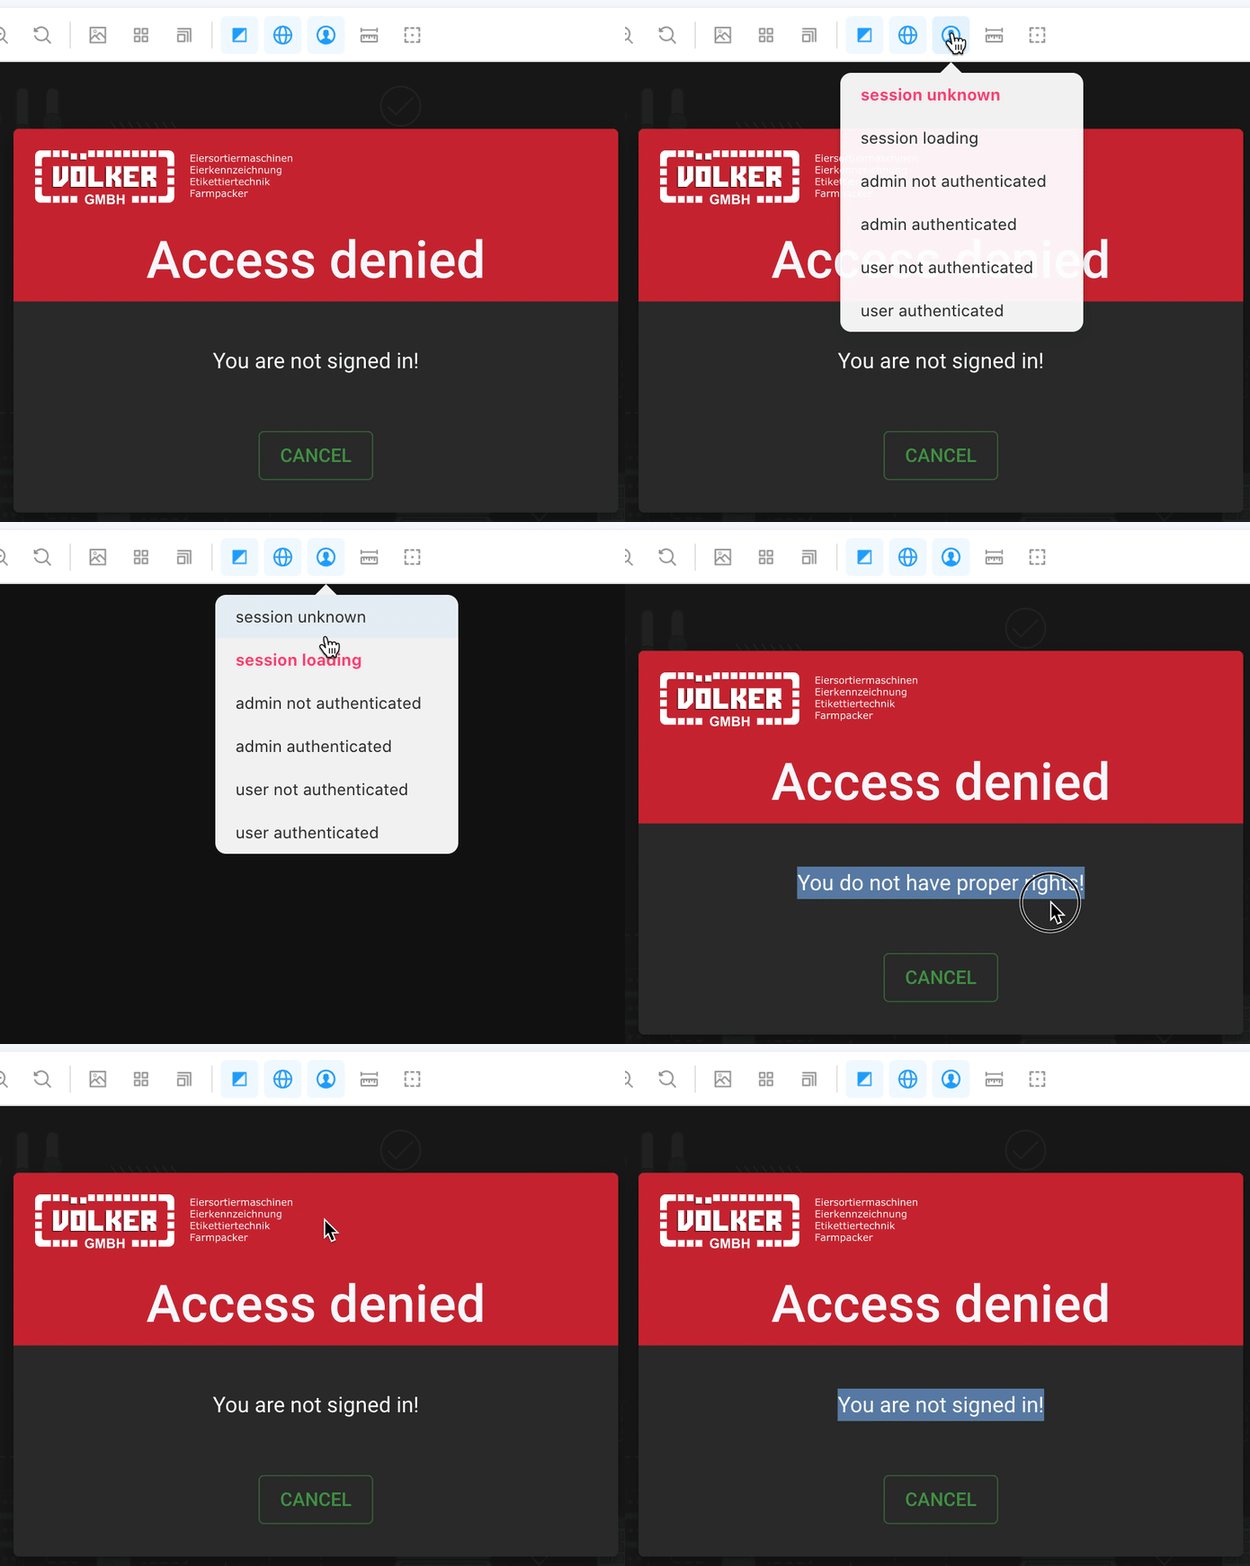
使用工具栏菜单
重新启动 Storybook 后,工具栏中将出现一个附加图标
这允许您选择会话状态。
编写 stories 并包含您的组件
// ./stories/pages/denied.stories.jsx

import DeniedPage from '@/pages/auth/denied';

export default {
  title: 'Pages/Auth',
  component: DeniedPage
};

export const DeniedPageStory = (args) => <DeniedPage />;

DeniedPageStory.parameters = {};
您现在可以通过工具栏项目控制和测试组件的 useSession() 状态

使用固定状态测试组件
为确保您的组件可以使用固定的认证状态进行测试,无论工具栏选择如何,您都可以通过在 stories 中使用参数来覆盖会话属性
// /stories/pages/signin.stories.jsx

import SigninPage from '@/pages/auth/signin';

export default {
  title: 'Pages/Auth',
  component: SigninPage
};

export const SigninPageStory = (props) => <SigninPage />;

SigninPageStory.parameters = {
  nextAuthMock: {
    session: 'unknown'
  }
};
上述将加载由 id unknown 定义的会话集。您也可以定义一个完整的会话对象,例如:
SigninPageStory.parameters = {
  nextAuthMock: {
    session: {
      data: {
        id: 999,
        login: 'user',
        role: 'user',
        roles: ['user'],
        username: 'User',
        email: 'user@local'
      },
      status: 'unauthenticated'
    }
  }
};
在 stories 中访问当前会话数据
如果您在使用会话值时需要更改 stories 代码,您可以通过 useSession hook 来访问这些值。
import { useSession } from 'next-auth/react';

export const MyStory = (props) => {
  // get access to current session data
  const session = useSession();

  ...
自定义会话认证状态
此组件带有一组默认的认证状态:unknown、loading、admin、adminAuthed、user、userAuthed。
/**
 *
 * default items for toolbar menu to select different auth-states while mocking
 *
 */
export const mockAuthStates = {
  unknown: {
    title: 'session unknown',
    session: null
  },
  loading: {
    title: 'session loading',
    session: {
      data: null,
      status: 'loading'
    }
  },
  admin: {
    title: 'admin not authenticated',
    session: {
      data: {
        id: 1,
        login: 'admin',
        role: 'admin',
        roles: ['admin', 'user'],
        username: 'Administrator',
        email: 'admin@local'
      },
      status: 'unauthenticated'
    }
  },
  adminAuthed: {
    title: 'admin authenticated',
    session: {
      data: {
        id: 1,
        login: 'admin',
        role: 'admin',
        roles: ['admin', 'user'],
        username: 'Administrator',
        email: 'admin@local'
      },
      status: 'authenticated'
    }
  },
  user: {
    title: 'user not authenticated',
    session: {
      data: {
        id: 999,
        login: 'user',
        role: 'user',
        roles: ['user'],
        username: 'User',
        email: 'user@local'
      },
      status: 'unauthenticated'
    }
  },
  userAuthed: {
    title: 'user authenticated',
    session: {
      data: {
        id: 999,
        login: 'user',
        role: 'user',
        roles: ['user'],
        username: 'User',
        email: 'user@local'
      },
      status: 'authenticated'
    }
  }
};
可以根据您的需要完全或部分更改这组状态。因此,您可以在本地文件夹中创建一个名为 .storybook/previewMockAuthStates.js 的文件,并为 webpack 定义一个别名。
更新 .storybook/main.js
module.exports = {
  addons: ['@tomfreudenberg/next-auth-mock/storybook'],
  webpackFinal: async (config) => {
    config.resolve.alias['@tomfreudenberg/next-auth-mock/storybook/preview-mock-auth-states'] = path.resolve(__dirname, 'previewMockAuthStates.js');
  }
};
Webpack 现在将加载您的 .storybook/previewMockAuthStates.js 文件,用于 previewMockAuthStates 集
只需克隆默认状态
const defaultMockAuthStates = require('@tomfreudenberg/next-auth-mock').mockAuthStates;

module.exports = defaultMockAuthStates;
更改部分状态
const defaultMockAuthStates = require('@tomfreudenberg/next-auth-mock').mockAuthStates;

module.exports = {
  ...defaultMockAuthStates,
  admin: {
    title: 'My Admin unauthenticated',
    session: {
      data: {
        id: 777,
        field: 'Additional session field'
      }
    }
  }
}
只用您自己的状态
module.exports = {
  state0: {
    title: 'State zero',
    session: null
  },
  state1: {
    title: 'A State',
    session: {
      data: {
        id: 1,
        user: 'What you like'
      }
    }
  }
}
自定义工具栏图标和项目
工具栏入口也可以完全更改。为此,您需要在 preview.js 中手动实现 decorator,并根据需要设置 mockAuthPreviewToolbarItem() 的选项。注意:在这种情况下,不要将组件添加到插件中。
更新 .storybook/preview.js
import { mockAuthPreviewToolbarItem, withMockAuth } from '@tomfreudenberg/next-auth-mock/storybook';
import { previewMockAuthStates } from '@tomfreudenberg/next-auth-mock/storybook/preview-mock-auth-states';

export const globalTypes = {
  ...mockAuthPreviewToolbarItem({
    description: 'Auswahl Anmeldestatus',
    defaultValue = null,
    icon = 'user',
    items = previewMockAuthStates
  })
};

export const decorators = [withMockAuth];
Jest
编写测试并包含您的组件
// ./tests/pages/signout.stories.jsx

import { render, screen } from '@testing-library/react'
import { withMockAuth } from '@tomfreudenberg/next-auth-mock/jest';
import SignoutPage from '@/pages/auth/signout';

describe('Pages', () => {
  describe('Signout', () => {
    it('should render want to sign out', () => {
      render(withMockAuth(<SignoutPage />, 'userAuthed'));
      expect(screen.getByText('Do you want to sign out?'));
    });
    it('should render not signed in', () => {
      render(withMockAuth(<SignoutPage />, 'unknown'));
      expect(screen.getByText('You are not signed in!'));
    });
  });
});
您可以输入 mockAuthStates 条目的名称作为 withMockAuth 的参数,或直接放入一个会话对象。
import { mockAuthStates } from '@tomfreudenberg/next-auth-mock';
render(withMockAuth(<SignoutPage />, mockAuthStates.userAuthed.session));

// is equal to

render(withMockAuth(<SignoutPage />, 'userAuthed'));
有效状态包括:unknown、loading、admin、adminAuthed、user、userAuthed
贡献
如果您想为 next-auth-mock 包做贡献或需要从源代码使用它,您必须安装 devDependencies 并构建 dist 包。
只需执行
git clone git@github.com:TomFreudenberg/next-auth-mock.git

cd next-auth-mock

pnpm install

pnpm build
欢迎您的想法和拉取请求(PRs)。
npm 包
您可以在 npmjs.com 上找到、使用和下载此 npm 包。
文档
项目主页 - 您可以在 Github 上找到 README 文件
作者 和 致谢
Copyright (c) 2022 Tom Freudenberg,根据 MIT 许可发布
