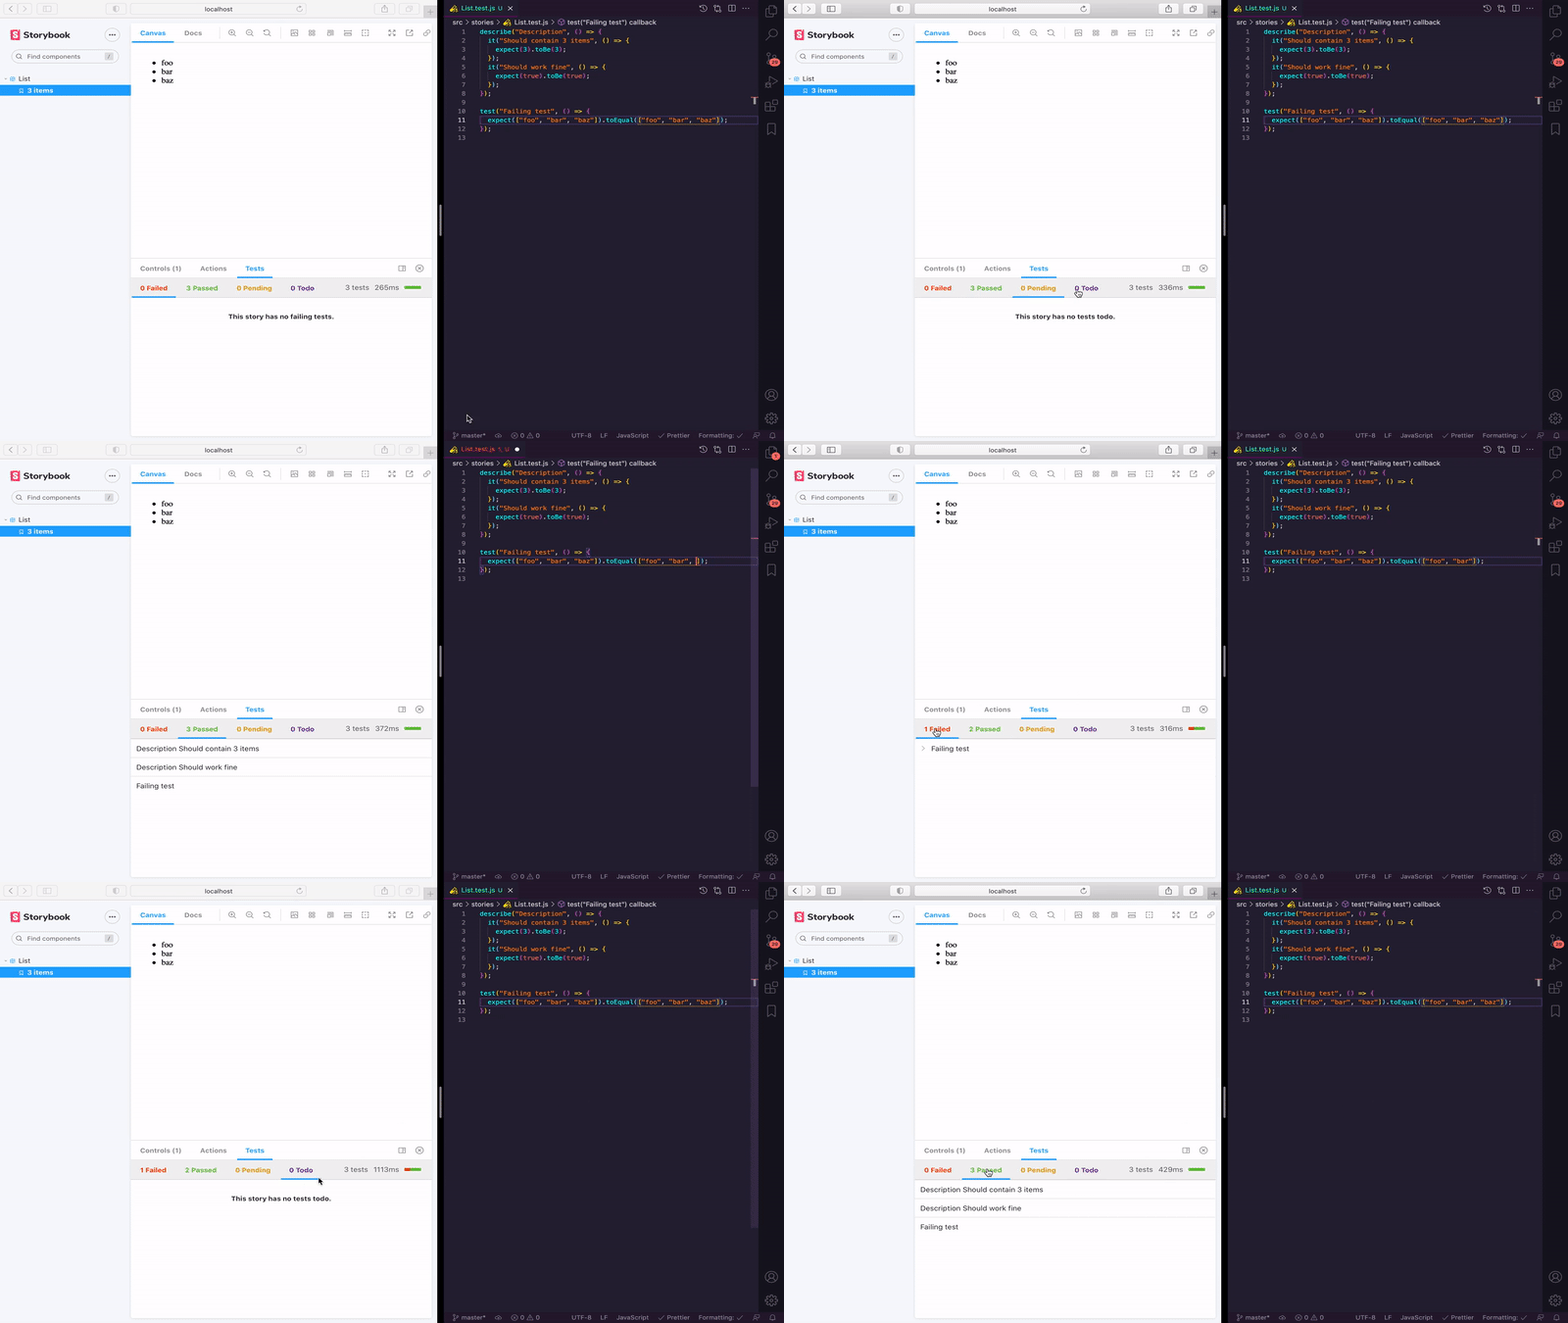
Storybook Jest 插件
一个用于检查 Jest 单元测试结果的 Storybook 插件。
查看上面的 在线 Storybook。
安装
将 @storybook/addon-jest 作为开发依赖项安装此插件:
npm install --save-dev @storybook/addon-jest
或者如果你使用 yarn 作为包管理器
yarn add --dev @storybook/addon-jest
配置
在你的 .storybook/main.js 中注册该插件
export default {
  addons: ['@storybook/addon-jest'],
};
Jest 配置
运行 Jest 时,请务必将结果保存到 JSON 文件中
"scripts": {
  "test:generate-output": "jest --json --outputFile=.jest-test-results.json"
}
你可能想将结果文件添加到 .gitignore 中,因为它是一个生成的文件
.jest-test-results.json
但是,与 lockfile 和 snapshot 类似,提交生成的文件也有其特定优势。这取决于你。我们建议提交测试结果文件,这样从一个干净的 git 克隆启动 Storybook 时就不需要先运行所有测试,但这可能意味着将来你会在此文件上遇到合并冲突(重新生成此文件与重新生成 lockfile 和 snapshot 非常相似)。
生成测试结果
在启动 Storybook 之前,请确保已生成测试结果文件。在开发过程中,你很可能会在 watch 模式下启动 Jest,因此每次代码或测试更改时,JSON 文件都会重新生成。
npm run test:generate-output -- --watch
并且在 jest 配置中,将 jest-test-results.json 添加到 modulePathIgnorePatterns 中,以避免无限循环。
modulePathIgnorePatterns: ['node_modules', 'jest-test-results.json'],
然后,此更改将使用 webpack 进行 HMR(热模块重载),并由该插件显示。
如果你想在开发或静态构建期间自动预先运行 Jest,你需要考虑如果你的测试失败,脚本会接收到一个非 0 的退出码并退出。你可以创建一个 prebuild:storybook npm 脚本,通过在其末尾添加 || true 来确保它永远不会失败。
"scripts": {
  "test:generate-output": "jest --json --outputFile=.jest-test-results.json || true",
  "test": "jest",
  "prebuild:storybook": "npm run test:generate-output",
  "build:storybook": "build-storybook -c .storybook -o build/",
  "predeploy": "npm run build:storybook",
  "deploy": "gh-pages -d build/",
}
使用方法
假设你已经为你的组件创建了测试文件(例如,MyComponent.test.js)。
Story 级别
在你的 story 文件中,为 story 的默认导出添加一个 装饰器 来显示结果
// MyComponent.stories.js|jsx
import { withTests } from '@storybook/addon-jest';
import results from '../.jest-test-results.json';
import MyComponent from './MyComponent';

export default {
  component: MyComponent,
  title: 'MyComponent',
  decorators: [withTests({ results })],
};
你也可以通过包含 jest 参数 在你的 story 中添加多个测试结果,例如
// MyComponent.stories.js|jsx

import MyComponent from './MyComponent';

import results from '../.jest-test-results.json';

import { withTests } from '@storybook/addon-jest';

export default {
  component: MyComponent,
  title: 'MyComponent',
  decorators: [withTests({ results })],
};

const Template = (args) => <MyComponent {....args} />;

export const Default = Template.bind({});
Default.args = {
  text: 'Jest results in Storybook',
};
Default.parameters = {
  jest: ['MyComponent.test.js', 'MyOtherComponent.test.js']
};
全局级别
为了避免在每个 story 中导入测试结果,你可以更新你的 .storybook/preview.js 并包含一个装饰器,该装饰器允许你仅为定义了 jest 参数的 story 显示结果
// .storybook/preview.js
import { withTests } from '@storybook/addon-jest';
import results from '../.jest-test-results.json';

export const decorators = [
  withTests({
    results,
  }),
];
然后在你的 story 文件中
// MyComponent.stories.js|jsx

import MyComponent from './MyComponent';

export default {
  component: MyComponent,
  title: 'MyComponent',
};

const Template = (args) => <MyComponent {....args} />;

export const Default = Template.bind({});
Default.args={
  text: 'Jest results in Storybook',
};
Default.parameters = {
  jest: 'MyComponent.test.js',
};
如果未提供 jest 参数,则默认会从你的 story 文件名推断。例如,如果你的 story 文件是 MyComponent.stories.js,则会使用 "MyComponent" 来查找你的测试文件结果。它目前在生产环境中不起作用。
禁用
你可以通过将 jest 参数设置为 {disable: true} 来禁用单个 story 的插件
// MyComponent.stories.js|jsx
import MyComponent from './MyComponent';

export default {
  component: MyComponent,
  title: 'MyComponent',
};

const Template = (args) => <MyComponent {...args} />;

export const Default = Template.bind({});

Default.args = {
  text: 'Jest results in Storybook',
};
Default.parameters = {
  jest: { disable: true },
};
与 Angular 一起使用
将此插件与 Angular 一起使用需要一些额外的配置。你需要安装并使用 jest-preset-angular 配置 Jest。
然后,在你的 .storybook/preview.js 中,你需要添加一个包含以下内容的装饰器
// .storybook/preview.js
import { withTests } from '@storybook/addon-jest';
import results from '../.jest-test-results.json';

export const decorators = [
  withTests({
    results,
    filesExt: '((\\.specs?)|(\\.tests?))?(\\.ts)?$',
  }),
];
最后,在你的 story 中,你需要包含以下内容
// MyComponent.stories.ts
import type { Meta, StoryFn } from '@storybook/angular';
import MyComponent from './MyComponent.component';

export default {
  component: MyComponent,
  title: 'MyComponent',
} as Meta;

const Template: StoryFn<MyComponent> = (args: MyComponent) => ({
  props: args,
});

export const Default = Template.bind({});
Default.parameters = {
  jest: 'MyComponent.component',
};
可用选项
- options.results: OBJECT Jest 输出结果。必填
- filesExt: STRING 测试文件扩展名。可选。这允许你只写 "MyComponent" 而不是 "MyComponent.test.js"。它将用作正则表达式来查找你的文件结果。默认值为
((\\.specs?)|(\\.tests?))?(\\.js)?$。这意味着它将匹配:MyComponent.js, MyComponent.test.js, MyComponent.tests.js, MyComponent.spec.js, MyComponent.specs.js...
TODO
- 添加覆盖率
- 更好地显示嵌套测试 (describe)
- 显示测试日期
- 添加单元测试
- 添加 Linting
- 拆分
贡献
欢迎所有想法和贡献。
许可
MIT © 2017-至今 Renaud Tertrais
